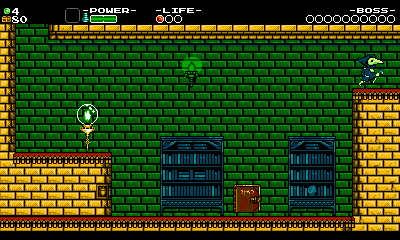
:quality(80)/f/93161/2084x1506/aec2810efd/featlogoplague.png)
Plague Knight Mobility Tips and Tricks
We talked last time about creating character mobility that featured a learning curve for the player. Now that we have the basics established, we can show you some tips and tricks to master the mobility to get the most out of it.
/f/93161/1920x1080/4f88baf87f/featcardpk.png)
We talked last time about creating character mobility that featured a learning curve for the player. Now that we have the basics established, we can show you some tips and tricks to master the mobility to get the most out of it.
During development, the basics being fleshed out allowed for us to design and implement more polish and tighter control. If you haven’t yet, be sure to check out part 1 to learn about the Plague Knight character’s core move set, or read the instruction manual to know more about Plague Knight’s campaign.
One thing to remember – these tricks are not required to beat the game! We designed the basic mobility so it was entirely enough to get you through the game without all the bells and whistles. But isn’t mastering mobility fun?
Mastering Plague Knight
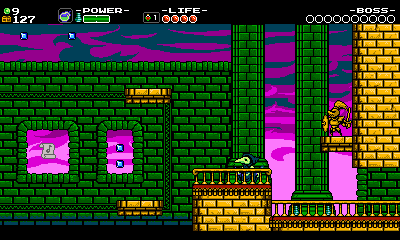
Bomb Burst – Kill your momentum with a double jump!
Plague Knight’s sideways Bomb Burst can be useful for jetting from place to place, but when used recklessly it’s also a great way to fling yourself off a ledge! Luckily there are safeguards in place.
Jumping again when Bomb Bursting allows Plague Knight to shoot across the screen, butjumping without pressing any direction(usually called a neutral jump) breaks all momentum with a hop straight up. In earlier iterations, we tried having this neutral jump ease you to a stop over time. However, this behavior overlapped with the bomb throw’s ‘ease to a stop’ motion and was inconsistent with the snappy behavior of Plague Knight’s other jumps. Having a clean stop gives players the option of saving their double jump to help stick the landing.

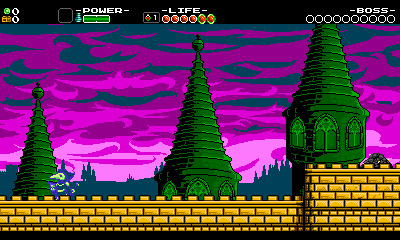
Bomb Burst Straight Up!
Alternatively, Bomb Bursting without pressing a direction will send Plague straight up, removing the crazy fixed arc of the sideways Bomb Burst. This allows a lot more control over where Plague lands, and goes even higher than the sideways Bomb Burst! You can use this to get up high for an aerial attack too.

Iteration on the Bomb Burst was key. We spent a lot of time determining the right amount of control to give the player, while still giving Plague Knight that wild feel.
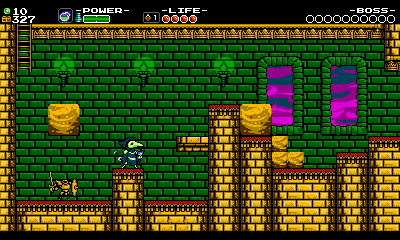
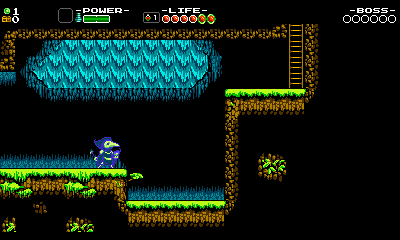
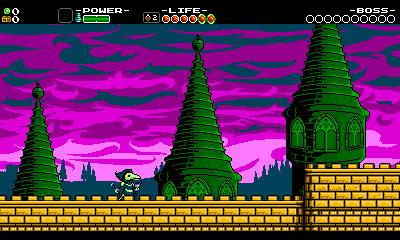
Crazy height, crazy distance!
Because we needed to cover the height of Shovel Knight’s normal jump as well as the additional height gained from bouncing on an enemy, Plague Knight’s extra jump height wasn’t a concern to us from the a level design standpoint. Getting great height takes some mastery to execute and can be risky…but it can also be a ton of fun too. Notice how we combine double jumps and bursts in order to reach ledges you couldn’t without help before.

Jump, Burst, Throw, Jump, Burst!
Also, note that the additional height combined with the burst speed lets you cover great lengths. With proper timing and a little bit of courage, you can sail through entire rooms of obstacles.

It’s tough to balance difficulty when your platform character can jump to almost any platform! To avoid these issues, we focused on keeping the tricks more challenging to pull off at an execution level (similar to a Metroid mobility set). We also had more freedom since this was an alternate adventure to Shovel Knight’s main campaign. Being able to conquer new heights and explode over gaps that you couldn’t with Shovel Knight makes it all the more fun as you occasionally feel like you’re breaking the rules of the game!

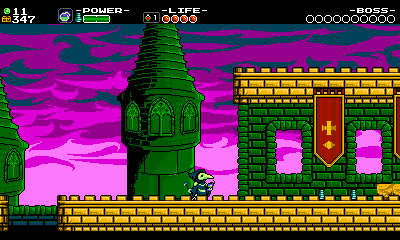
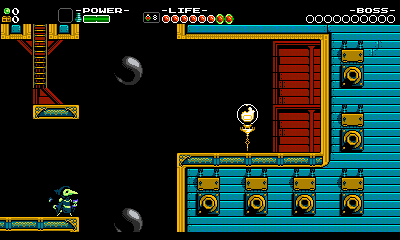
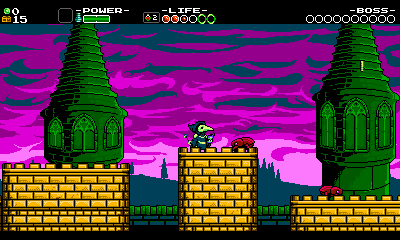
Bomb Jumping Like a Pro can get you all sorts of places...
Air throw for a height bump!
Sometimes you’d end up really close to making it up a nearby platform as Plague Knight. To avoid this frustration, we added a bounce that Plague Knight performs on each throw, giving him a slight bump in height. This can make your throws even more clutch!

Burst Invulnerability and Attack
Remember how the Bomb Burst explosion does damage? Don’t forget that! When enemies take damage, they flash and you can go through them. While this let Shovel Knight beat melee enemies to the punch, it allows Plague Knight to Bomb Burst past:


Bomb Burst Through Enemies!
This mobility combined with the game’s combat rules makes this move ideal for a quick escape out of a tight situation. But what about hazards that can’t be damaged? Luckily, Plague Knight is also invulnerable for a few frames after Bomb Bursting:

Fly through obstacles with the Bomb Burst
This invulnerability is important! It gives the player the edge needed to go in and play more dangerously.
Players need only focus on only two things: charging ahead of time, and getting close to an obstacle or enemy. Burst invulnerability prevents up close encounters from feeling frustrating or cheap.
It’s an awful feeling in a game when you successfully hit an enemy, only to be immediately knocked away. Shovel Knight’s Shovel Drop & bounce also have unique invulnerability rules because we wanted the character’s signature attack to be frustration free and fun to pull off. The same stands for Plague Knight – take advantage of the Bomb Burst’s invulnerability and nothing can stand in your way!
Throw More Bombs, Go More Slow
Have you noticed that Plague doesn’t really start slowing down until he throws his second bomb? You need to toss a lot to slow all the way down.
This is good because it helps players better control their speed, keep momentum when bombing weak enemies, and charge another Bomb Burst! Keep this in mind as you figure out how to optimize speed runs through each stage.

This bomb throwing slowdown was established through design iteration. It was important for us to maintain Plague Knight’s sense of speed, as that really sets him apart from Shovel Knight.
Bomb Burst Buffering
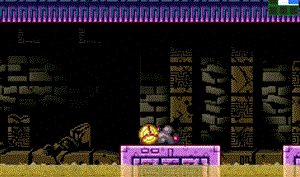
When an instant action and a charge-up action are mapped to the same button, you get a problem that occurs in many games:

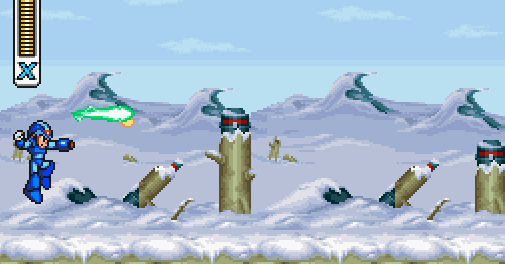
You gotta shoot a pellet to charge your buster!
Notice above in Mega Man X that charging your arm cannon immediately after releasing a charge shot results in an unintended pellet. This unintended attack can lead to unfortunate consequences – for instance, an enemy might get hit by the small attack and not the big one! NES Mega Man games solve this problem by giving the charge shot a large cooldown, which slows gameplay down while you wait for the shot to finish… not so fun either!
We found it important to solve for this problem with Plague Knight’s mobility, which is why we added a buffer period where the player could charge a burst without throwing a bomb.
Basically, if you throw immediately after Bomb Bursting, no bomb comes out!
Observe the technique below:


The bomb button is held within a few frames of using the burst here, sending the player straight into charging the next Bomb Burst instead of throwing a bomb. It can be a very helpful technique to make a quick getaway, cover more ground without throwing a bomb and slowing down too much.
Bursting While Getting Hit!
There are other cases where we wanted to give you the ability to charge without having to throw a bomb first. One of those is the get hit animation:

Save yourself with a Bomb Burst!
This allows players to more easily save themselves in dangerous situations or begin their counter attack.
Screen Scroll charging!
There’s actually very few places where you can’t charge your Bomb Burst! Opening a chest? Talking to an NPC? Climbing a ladder? You can charge during all of these!
All of these states take different levels of control away from the player, but we never wanted the player to feel like their charge was being lost. The start, stop, and total time needed to charge should remain consistent across the entire game, regardless of player states, so that you could always have the timing down in muscle memory even when performing complicated platforming. After while, you probably don’t even need the visual flash to know that you have a charge ready – it becomes intuitive.
One of the coolest parts of this rule is that you can get a Bomb Burst ready during any of the game’s room screen transitions!

Explode onto the next screen by charging during the transition!
Be the Trickster!
Wow, that’s a lot of tricks! Plague Knight gets really enjoyable when all of these tools are under your mastery so make sure to study up! We hope delving into these a bit shows how much time can be invested into every tiny mechanic, and how important each element is to the final result. Even while iterating based on what “feels right”, it can also be helpful to take the time out to put the end result into words, especially when discussing it with other members on your team! And don’t think this is everything…let us know if you discover any tricks we didn’t mention! Have fun!